Wednesday, December 8, 2021

LANDSCAPE PAINTING: Using Oil Pastel

Hello Creaative Schoolers!  You are Soooo COOL!  Thank you for reading my blog and I hope you are learning a lot from our featured artists and topics.

Today, let us study how to do paintings using oil pastel.  Do you know that soft oil pastel can be very versatile and can produce textured paintings?  The challenge with oil pastel is you need to find really good quality colors and not the hard wax-type colors.   So to help you find a good material to start drawing, we looked online to find affordable materials.  I'll be naming here a few so that you'll not find it hard to buy one.

Let us start learning by understanding the materials.

OIL PASTEL

Oil pastels are hardened pigments using oil as its base.  There are soft pastels, which are like chalks, but we are using the oil pastel that we commonly use at school to produce vibrant drawings.

The advantage of using oil pastels is that you don't need medium or any liquid in using it.  But if you want to thin in out, you may use cotton buds dipped on oil to spread it.  It is also very easy to keep and store it since it is dry.  Before, I keep it on its original box but when the oil pastel got very short because of constant use, I bought a plastic container with dividers.  You may also use food keepers with compartments.  It is advisable to separate the colors because it will become dirty if you keep it all together.  Though you have the option to wipe it clean with tissue prior to its use.

I am working on a landscape using oil pastel.  I tried it instead of using my usual acrylic paint because it is easier to carry when I am traveling or when I am working.  Sometimes, I get the urge to draw during in-between work breaks.

With regards to the brand, the best quality oil pastel is really expensive.  Holbein and Sennelier are usually used by professionals.  They are much more buttery and have smooth consistency.  The price of Holbein is about PHP 2,400.00 for a 24 pieces color set.  Sennelier is way expensive, which is about PHP 4,756.00 for a 24 pieces color set.

Now, don't despair.  If you are a beginner, you can still produce good quality paintings using much cheaper oil pastel but still has bright colors.  I suggest that you start with a Pentel oil pastel, which cost only about PHP 270.00 for a 36 pieces color set.  Another option is using Sakura Junior oil pastel set, which is a bit higher, PHP 300.00 for a 24 pieces color set.  

Since I've been using a lot of these oil pastels, I now have a mix collection of oil pastels with Sakura and Pentel brand in it.  The good thing about Sakura is that you can buy each color separately.  I usually consumed "white" fast.  So I bought a box of white Sakura, 12 pieces in a box.

PAPER PASTEL or PASTEL BOARD

Drawing paper can be used for oil pastel drawing.  However, the oil in the color seeped to the paper and if you want to preserve the painting or drawing, it can be very risky because it may bleed on the paper.

I use pastel paper or board because it has better absorbing quality and it has differing surface.  I side is smooth and the other side is textured.  To give added quality to the painting I use the textured side.

You may also use canvas but it's a bit harder for me because the canvas has less tooth or texture to hold the oil pastel.  There's a higher tendency as well to crease the painting when the canvas get removed from its mount. As experienced, the pastel paper or pastel board is the best option.

WAX PAPER TO PROTECT YOUR WORKS

You may want to buy a Wax Roll of paper, which is usually used for food keeping.  I use it to cover my oil pastel drawing or as divider when I draw on pads.  This will protect your painting or drawing from bleeding or transferring on other sheets.

BLENDING STUMP

For oil pastel, I use cotton buds or paper blending stump.  With cotton buds, you can actually thin out the oil pastel if you add linseed oil on it.  However, the cotton absorbs too much pigment.  Another option is the use of a blending stump.  The good thing about it is it absorb less pigment from the oil pastel and it can be used for finer details in the drawing.  Use whichever you are comfortable with.


LET US START PAINTING!!!

Now that you have all the tools or materials, let us proceed learning how to use oil pastel for drawing.

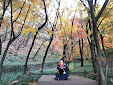
My reference photo is shared to us by another member of Let's Paint group.  Thanks to Sir Norbing Villez for sharing it.  The photos of painting sample I have here is still a work in progress.


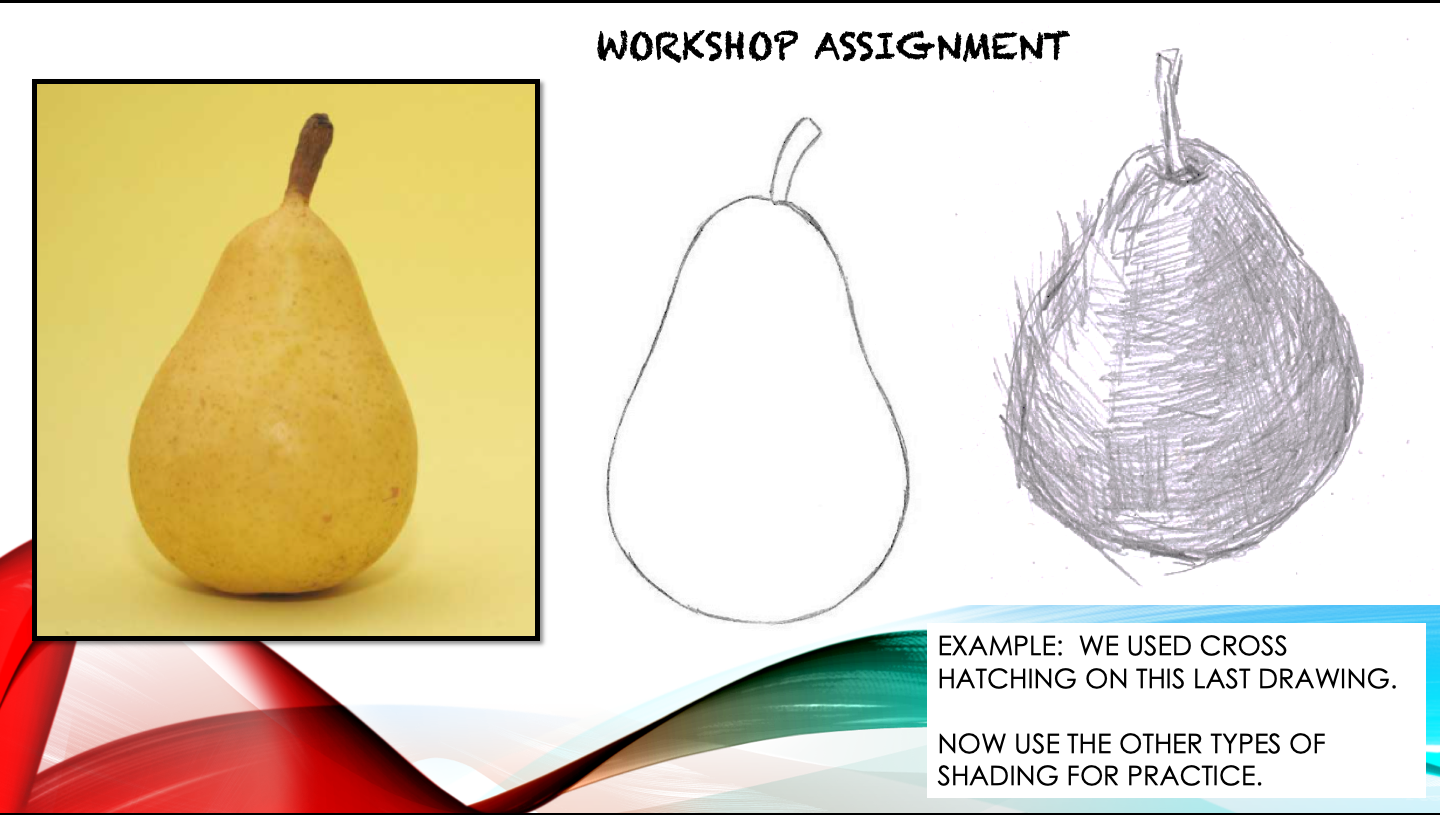
Step 1 - Using your reference, make a sketch of your drawing subject.

Step 2 - First layer of color for your base.  You may use water color or chose a pastel paper with colors already.

Step 3 - I usually start with the foreground.  Others start with the main subject.  The reason why I start with the foreground is because I want my subject to be layered on top of the background.  Find where you are more comfortable.

Step 4 - Finalize the details of your painting as you layered colors upon colors.  


ON-THE-SPOT LANDSCAPE PAINTING WITH MR. POL MESINA, JR.

I think you'll learn more by watching these demonstrations I gathered from YouTube.  Let us focus on LANDSCAPE painting or drawing as an exercise. (The two (2) succeeding videos are not mine but we included their link here to directly acknowledge the owners.) 

Allow me to introduce Mr. POL MESINA, JR. president and  one of the senior members  of ARTipolo Group.  You'll meet him next week when we release his feature interview.  I am sure you will learn a lot from him as he shares how he started in arts and how art helped him support his family as a full-time artist. 

But first, let us watch how he demonstrated this on-the-spot painting using oil pastels and nothing else.  He started with no sketch and directly applied raw colorings as guide for his painting.  He then layered the oil pastel and blended them. Lastly, he worked on the details of the central image, which are the trees.


Thursday, December 2, 2021

ARTipolo Group President, Mr. Pol Mesina, Jr.


This video interview happened on the last week of August 2021. But unfortunately, I was infected with Covid19 and failed to upload it earlier. Thanks be to God for the healing and complete recovery. Now, I can resume my blogging activity, which serves as my way to share lessons learned from fellow artists.

I feel that many would benefit from Mr. Pol Mesina, Jr.'s story as with how he started his endeavor in arts. He was patient, generous to share his gifts, and hold strong to this noble profession as an artist. Like other artist aspirants, it was not an easy journey. The regularity of income was one of the challenges. But when he was able to hone his gifts, he discovered the "flow" and soon enough, he was sailing towards his artistic goals.

This video comes in two parts. Part 1 tells more about his beginning. Part 2 tells us about ARTipolo group, how it started and what is its objectives. You cannot separate ARTipolo Group from Pol. Not just because he's the founding president of the group, but because he has committed to sustaining this group for the benefit of new and incoming artists.

Sir Pol, as we call him also started his art training from a master artist, Mr. Fernando Sena. I too learned so much from Mr. Sena. As you watch this video, you'll learn how master Sena left a mark on Sir Pol.  

After watching the video and reading the blog, please feel free to share. We give you this free recorded interview to learn from. We don't ask money to sustain this endeavor. But we hope you'll help us spread and pay-it-forward to other people. Art is not just for the young, but for all ages.

In the end, we give glory to our creator. To God be the Glory!


Friday, July 23, 2021

How to Draw Alive-Looking Eyes


If you want to learn how to draw faces and portraiture, one key to make it captivating and real is by drawing the eyes realistically or making it alive.  The eyes are windows to our soul or emotions.  Even through drawing, being able to draw a  captivating eye can change the appearance and impact of your work.

When I started learning how to draw portraiture, I practiced a lot on the eyes of the subject.  I experimented and finally, I learned how we can possibly draw alive looking eyes.  There are several materials online to learn how to draw beautiful looking eyes.  So I curated some here for different levels of learning.  

Remember, you will not grow if you don't practice.  So with these materials, I advise you get your tools and find a perfect place to start drawing.  

Drawing Eyes for Beginners

The following video illustrates an easy way of drawing eyes starting from a circle.  This video exhibits outlines and not much on shading.  Thus, as a beginner, you'll be able to produce eyes that may lack details.


Advance Art Tutorial - Drawing hyper realistic eye

The next video takes longer but the end product is much better.  This will teach you more details on shaping the eye and using the right amount of shading for pencil drawings. 


As you have seen from the video, you need to layer the shading starting from light to darkest.  To add more value and make it realistic, take notice of the highlights or how the artist lifted off some of the granite to reveal the white light.  Always consider where the light falls in your drawing.  Train your eyes to see the details of lighting.


Painting Realistic Eye

You may now have the urge to learn how to add colors to your artwork.  The following video is a time-lapse but would still give you idea on how to paint realistically looking eyes.  The medium used in this video is oil paint. Oil paint doesn’t dry quickly and needs longer time to finish. If you are going to use oil paint, you need to be patient and don’t rush your work.


Take notice of the process.  Different from using graphite, the artist started with dark background to build on the foundation of his painting.  Then little by little he layered the lighter colors and used fine brushes to shape and add volume to his painting.  The final touches uses tutanium white for highlights.  He also uses clean dry brushes for softening parts that he wanted to blend.  The good thing with oil paint is that you can blend colors well using linseed oil even after a day or two. The colors are brighter as well and blending is much easier compared to acrylic. When acrylic dries, you can no longer blend it.  With acrylic, you have to work on wet-on-wet.

After watching these videos, it inspires me to start working on my art.  I hope that through these materials, you are able to learn some tips on how you would work on your "Eyes".

Now here are other references related to this post:
* From Art Rocket  Easy Tips for Drawing Eyes
* From Marvin Todd's pin in Pinterest - Drawing Eyes

Wednesday, July 14, 2021

FEATURED ARTIST 2: MR. NORBING VILLEZ


In February 2021, I had the privilege to meet Mr. Norbing Villez, the founder of Let's Paint Group on FB via an online interview.  It was only now that I found time to post his feature. One of his paintings, "Tampisaw Series" painting number 1has caught my attention. I asked him if I can buy it but not with outright payment because I can't afford it with my meager salary. And I was surprised that he agreed to let me pay on three (3) scheduled terms. Maybe because he saw how much I liked his work and that I am sincere with my promises to pay. Hahaha!

The "Tampisaw" series became successful. Maybe because he does it without the intent of selling. He just loves the subject, which is his daughter. His paintings were also featured in a book and he has produced more than five (5) paintings under this series.


Mr. Norbing may seem like an outgoing and fun-loving person. However, he appears to be very shy during the interview. He works abroad and stays there with his family. Painting is not his main source of income but his rest venue. He paints because it is close to his heart. He takes care of his family and exposes them to art as well. His wife, also once been a part of a women exhibit in the Philippines. Mr. Norbing is also an active member of ARTipolo group, where I am an active member as well.

This month's feature, I'll be sharing with you his interview. You'll find him very humble and very willing to share his talent with many aspiring artists. Watch it and find out what I mean. For now, it is in Filipino. I will find time to translate it into English. Just click on the video below to view.


Thank you for watching the video.  Now here are some of his works and tips on how we can improve on our work.  If you want to learn his skills in doing pastel painting, he shared on his FB account some snips or video clips of his works.


The clips below are posted on his account.  Click on the image so that you can view how he finished this Koi painting.


This photo shows how he started painting the Koi.  


I mentioned earlier about his work being featured on a book. Here's the screenshot of his feature.


Check out this step-by-step photos on how he worked on Pebble Picking painting.

He made a sketch of the sitting girl.  Moving forward, he worked on the fine details of the central subject, moving-out to the background and fine details to complete the entire piece.


Click on this clip to see how he worked on the painting's details.


And here's how he worked on his "Tampisaw S6".


Follow Mr. Norbing Villez at his FB Account NORBING VILLEZ.


Tuesday, July 13, 2021

Upcycling is a Creative and Fun Activity for our Children

 It took us a long time to post new learning materials here. But I get obliged to share this article to help us cope with the long-lasting impact of the pandemic.  Allow me to share this craft activity that you can do with your children.

Our natural resources are dwindling and we need to help our earth recover and revive. To do that, we can tap on our creative minds and produce another product from the trash. We call this "upcycling".  I have heard of some industries earning much from upcycled materials. For example, google search "bags made of tarpaulin" and you'll get bags sold through Lazada, and from Freitag. The tarpaulin is very sturdy. If you have an eye for design, it will not be hard to produce a saleable upcycled bag.

Now, for our children let us make this simple but useful bath scrub for our backs. It is easy.


What you will need are net bags made of plastic.  These net bags were used to contain garlic. You may also use plastic net bags that were used to pack oranges or lemons.

Clean the net packaging materials and cut it into 1 single sheet so that it will be easy to fold.  Now get a string, or thick thread and a needle or crochet hook.  Use whichever is handy for you.  

Fold the net lengthwise.  Try if it's thick enough.  Usually, I do four-folds.  Then stitch it using the thick thread you found or knit it at the center so that it will not spread wide.

On both ends, seam the corners together and add a loop so that you can hold both ends.  Since I know how to crochet, I thickened the holder through knitting.  You may use ropes or other forms of thick handle for the ends.

Now, your back scrubber is finished!

 From this...

...to this.


Sunday, February 14, 2021

FEATURED ARTIST 1: CORAZON G. PATARATA

We have introduced to you a proficient and well respected artist, Ms. Corazon G. Patarata before the launch of CASCADE.  Now, we are featuring her once again as she shares her latest works with us. She has contributed well to our fund raising for CASCADE Art Studio and without her help, we would have found it difficult to sustain our activities.  For this month of February, allow me to introduce to you Ate Cora as we call her.

Ms. Patarata painted this bag when I asked her to share her talent for the sake of helping people with needs.  She willingly and excitedly acted on my request and has produced this pretty hand-painted bag, designed with the birds of paradise flowers.  This bag went to Ms. Michelle Diwa, who highly appreciated Ate Cora's works.


Latest work of Ms. Patarata
Bright Morning. acrylic on canvas. 24 in.high x 18 in wide. 2021


     61 years old, with an earlier 20-year experience as a diplomat, is a self-taught artist, who works with watercolors, oil pastels and acrylic paints, in a modern realist-impressionist style. Her subjects are flowers, landscapes, marine life, famous landmarks and monuments, heavenly bodies, and angels, and sometimes there are human figures included in her picture compositions.  Two articles about Cora’s painting career, penned by Babeth Lolarga, were published by Verafiles.Org and circulated in Yahoo News: “A Former Diplomat’s Sojourn Into Painting”, published on 30 May 2014; and “The Traveller As Painter”, published on 20 January 2017. Souce: https://verafiles.org/articles/traveler-painter

     Patarata is with the Antipolo-based artists’ group ARTipolo that has the Hemophilia Association of the Philippines for Love and Service as permanent beneficiary for all its exhibits. This self-taught vignette painter admires Amorsolo. “I aspire to someday learn his techniques with light and shadows.”Among the Renaissance artists, she singled out Rembrandt for the sensitivity of his human figures, Tintoretto for his lights and shadows, Paul Cezanne, Paul Gaugin and Vincent Van Gogh for their colors and brushstrokes.

     Of the moderns, she likes John Singer Sargent “for the emotional impact of his paintings,” Frida Kahlo “for her use of Nature as symbols for human emotions,” Miro “for his joyful and playful abstract renditions” and Norman Rockwell “for portraying scenes of everyday life that everyone can relate with.” 

     Now that she is doing what fulfills her, she calls painting “an essential part of me. Painting is something I owe to my Maker and to the people around me.Through the process, I enjoy many good feelings in heart and spirit.Painting is like praying. It is like a cleansing and uplifting process.”


     The following are Ms. Patarata's works.  If you are a collector or an Art enthusiast, you may want to avail one her works, which is posted in our Gallery Shop.     Check it out now!

"A Place For Healing", acrylic on canvas, 24 inches high x 30 inches wide, 2021.       


Lesson 3: Different types of Shading.

 A simple drawing is lifeless and appears as one dimensional.  To give it a 3D or three dimensional look, we need to define where are the lights coming from and how does it falls on the object.  Then we need see where the shadows are.

In creating shadows on our objects, there are several types of shadows.  We have taught you about the hatching, thatching, and cross-thatching from previous posts.  Now, let us continue learning the other types of shadowing styles and let us practice by repeating what has been shown in the featured videos.

The first video that we will show is from the works of Ms. Lauren Arno.  She showed how to do the following:
  • Cross hatching
  • Hatching
  • Contour Shading
  • Scribbles
  • Strippling, and
  • Circular lines


The next video is an application of lighting on geometrical shapes by Bial-Art Art school. The video demonstrated well how one should look at the direction of the light and the volume of shadows to improve the appearance of the drawing.


LET'S PRACTICE DRAWING 
 Now, to improve our drawing techniques in drawing, let us look at the following drawings as our references. Follow the following steps in our practice drawing: 
STEP 1. Draw 6 circles in a bond paper or drawing paper 
STEP 2. Shade the 6 Circles based on the 6 shown kinds of shading below;
STEP 3. After doing the sphere shading, apply all types of shading based on what you learned to a pear. See the photo below.
Share your works by commenting on this post and stay tune for next featured free art lessons online.

See below other reference videos for practice:


Thursday, February 4, 2021

Sunday Online Practice Class on Drawing with Ink

 Hello readers! I was quite a while that we haven’t had a free art lesson.  This Sunday, February 7, 10 a.m., may I invite you to a free tutorial on drawing using ballpoint pens.  It will be online and we will use zoom for our meeting.  To join, please send me your e-mail address so I can send you the invites and link.  You may use the form below, left side for a private message or use the FB Chat pop-up at the right side of this blog.

Since we will be practicing, be ready with your pencil, ballpen and paper.  I will be using a reference but if you have a subject you wish to use other than what I will provide, you may do so.  This will be an exciting art session.  Ready with your drawing table and camera so I can check your works.

See you then!


Sunday, January 31, 2021

A Simple Poem: LONGING


LONGING by Rose Gob

How long has it been when I last saw you?

The 1st time we met was seven years ago,

Now all that we have are just memories

I feel my heart swell as I remember our stories.


Your words still ring out from the corners of my mind,

I vividly see the rainbows and the promise to find,

The warmth of the sun was a welcome embrace,

Against the cold wind as we walk that place.


Vicariously I lived through your eyes,

I long to be there when you sighed,

I long to share with you my baffling thought,

And reach out a hand to touch you for comfort.


Pens on paper. cards on mail,

A stamp on an envelope excites like a gale,

A call and a voice are not the same,

Compared to emoticons, or online fame.


People are social species of life,

An introvert still needs friend to like.

Enjoying the sunset as we wait the time,

For the thousand years sublime.


Alas, it’s one in the clock’s hour,

Let me close my eyes and door,

Count ‘til six, and all will be gone,

For this mind of mine would speak of none. 


Goodnight...


#rosegob #poetry #poem

Video Tutorials: Painting with Watercolors or Poster Colors and Oil Pastel

Hello, beautiful children and adults deserving excellence! Finally, I found time to create another video, which I hope you'll find useful as you try to learn how to make art. Allow me to say that though I am not a master in arts, I still love to share what our creator had endow to your humble servant. Let us learn ARTS!


Today, we will be using your watercolor or poster colors, and oil pastel, whatever brand you have. I am sure, you have these in your schoolbags and being stuck there for a long time. Let us find a photo that you like and use it as a reference. Now, since I want to see once again mother nature in her full splendor, let me use a photo of a stream shared to us by fellow artist, Mr. Norbing Velez as a ready reference.

The materials that we will need are as follows:
1. Watercolor or Poster colors
2. Oil Pastel
3. Paper or Canvas Pad
4. Masking tape
5. Pencil for sketching
6. Eraser
7. Hardboard or a piece of plywood

Now, this is part 1 of a work-in-progress. I haven't done part two, but do stay tuned because I am determined to finish this piece and share it with all of you.

If upon watching the video, you are able to create beautiful work, please feel free to post it here or on our blog (see about info for blog address). Who knows, you may win a pad (for children only, Hehehe).

Enjoy!!!


About Rose Gob

My photo
Hello! Thank you for reading my blog. I am Rose Gob, a Knowledge Management expert, a seasoned HR and OD practitioner, an artist and an educator by heart. I have created three (3) blogs to share articles in the field of creative arts, cooperative, social enterprise industry. But among these blogs, I write more for my art blog, www.cascadeartstudio.com. During the pandemic, I was able to populate my blogs with various topics. But now, I realized that I need to focus. I hope you will give me feedback for topics that you want to learn. Send me questions and I'll try my best to answer your questions. Again, thank you for reading and please do check my blogs often. Have a great day!