We had a three-day vacation last Saturday until Monday (August 27 to 29, 2022). We went to a place where there's no data or wifi, and the cottage that we rented have no TV programs. What we have are open cabanas, videoke, and a large pool. We indeed enjoyed our stay and was able to relax because there's no internet that would occupy us, so we spent so much time bonding with family members.
 |
| This was my output during the said outing |
Whenever I don't feel like swimming, I spent time doing freehand drawing. And so our topic for today, is how you can draw a portrait, without having rulers, or grid lines but just a reference. This approach is a freehand drawing. Usually, if there are no scales, it is quite difficult to find where to place the parts of a face. But with this simple guide of using circles, and shapes, you'll find it easy to draw faces.
I have included a video at the latter part of this article. I promised the video owner, https://www.youtube.com/c/ChommangDrawing, that I'll acknowledge him. Check out his channel and you'll get useful tutorials on drawing.
STEP-BY-STEP INSTRUCTION ON DRAWING FACES
This will be our reference photo:
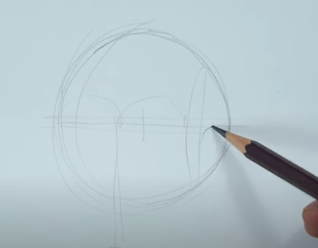
 Step 1: First, draw a circle, which is our guide for the upper portion of the face. If you will visualize a skull, the upper part of the head is spherical in shape.

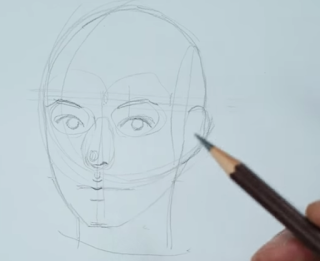
Draw the lower shape of the face, which is the chin. The mid line of this shape would be the place for the mouth. Draw a line at the mouth's opening, and the upper lip and lower lip to follow.
You may now proceed with erasing some parts of the head that you feel is not needed; determine now the exact shape of the face by outlining with heavier marks. Since one ear is showing, draw its outline. Usually, the upper part of the ear starts under the brows and ends at the end of the nose.
Step 3: Proceed with detailing. Draw the eyes as to how you see it. Followed by the nose and lips. If you are distracted with the references, you can erase it as soon as you are able to achieve the exact shapes and details of the face.
 It is not necessary that you follow the guidelines as you draw. If you feel that there are slight changes to make it look exactly as the photo, do change the parts. It is advisable that you draw using light stroke first before you finalized the lines or parts of your drawing.
 For the hair, find the center where the hair parted. Usually, the hair flows out of the sphere borders. Use curves as to how the hair flows out. Do not shade it yet.
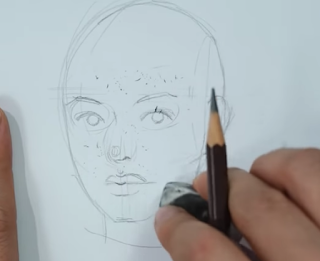
 When you are able to fine the details, you may now use darker and heavier strokes for finishing the face outlines.
Step 4: Shading - Now that you see how the face appears, erase all sketches or guides and clean up the face. Then shades the eyes, lips, hair and other shadows. Get the exact hue of shades so as to develop a 3D appearance or to put life to your drawing. Highlights can be achieved by lifting out shades using your eraser.


